
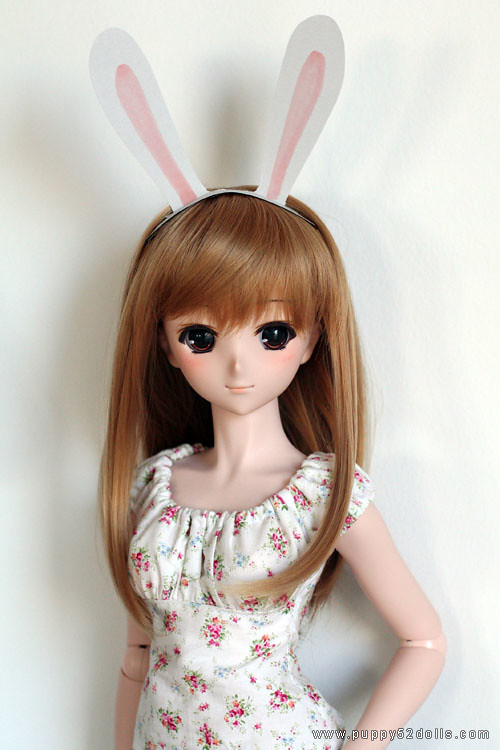
Tutorial: Paper Bunny Ears for Dollfie Dream
Want to make those paper bunny ears for your own dollfie dream girls? Here’s a quick post on how to do it :) You can probably resize the file to fit other dolls if you like :)
For this tutorial, you will need:
- access to a printer
- paper (to print the template)
- card stock paper (to make the actual bunny ears)
- scissors
- pencil to trace the template onto card stock paper
- marker or other colour paper to draw in the pink area as shown in the template
1) Save this template onto your computer, and print it out using a picture editing program.
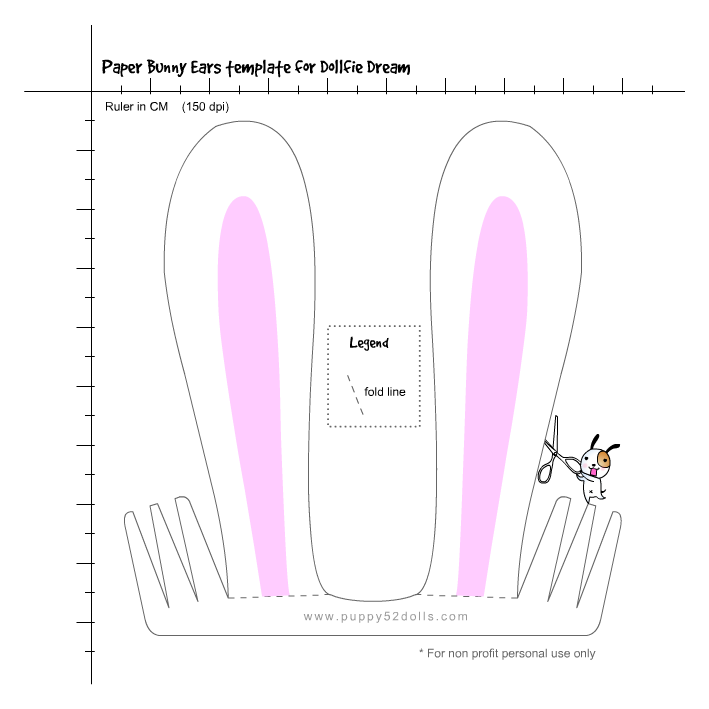
2) To make it easier to cut everything out, cut around the template roughly, following the red line shown as below:

3) Cut out the smaller details, as shown in the red lines below.
Trace the template on the card stock with pencil and cut it out the same way as shown as step 2 and 3. When done, colour the pink area of the ears, or cut a different colour paper to stick on, use your imagination :)
The parts on the two sides will act as a “comb” to hold the ears down in place on the dollfie’s wig.

4) Fold the card stock ears forward at where the “fold line” is indicated in the template, and carefully insert the “comb” part under the wig — be careful the “teeth” part of the comb may get folded. And you have just turned your dollfie dream girl into a Bunny girl ^o^! Take a picture and show me! :P
For other simple tutorials you can check the tutorials page :)
That’s such a cute idea! I bet you could do that with any shaped ears :)
very possibly ^^!
They are so cute chun!!
Thanks XD Glad you think so!
Lol, thanks for posting a tutorial. Might try it but I do not have a printer… (will have to go bug someone to print it then)
you welcome :D huhu hope you get to print it out later :3
Hahaha the cute puppy with the scissors is cute! XD
muhaha lol
They look cute! :D
I can’t wait to make one ^^
Look forward to see what you come up with :D