
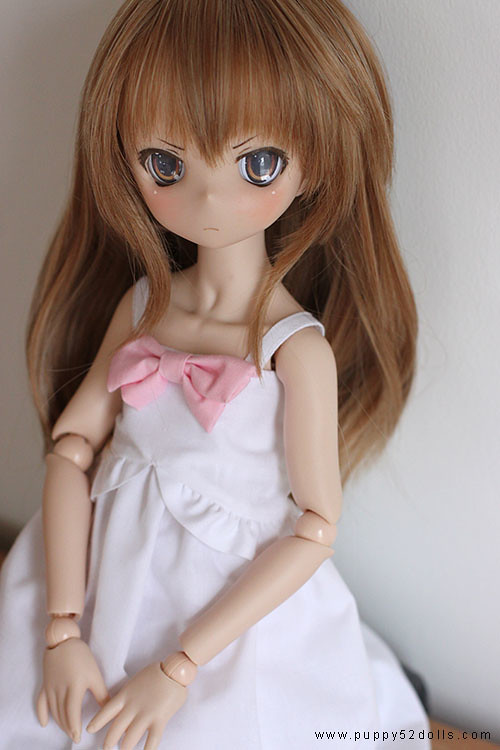
Taiga Aisaka custom version II
I have always admired the custom heads which is often featured in the Japanese blog: 伝達戦士コクチバンR (Galaxy Police) — they were what inspired me to make my own Taiga Aisaka custom Mini Dollfie dream.

I had been meaning to make a version II of Taiga’s head for a while now, and after I discovered some custom eye option, I decided not to wait any longer, heads were purchased (Thanks again Nicole!) and work was started when the weather became more suitable ^^
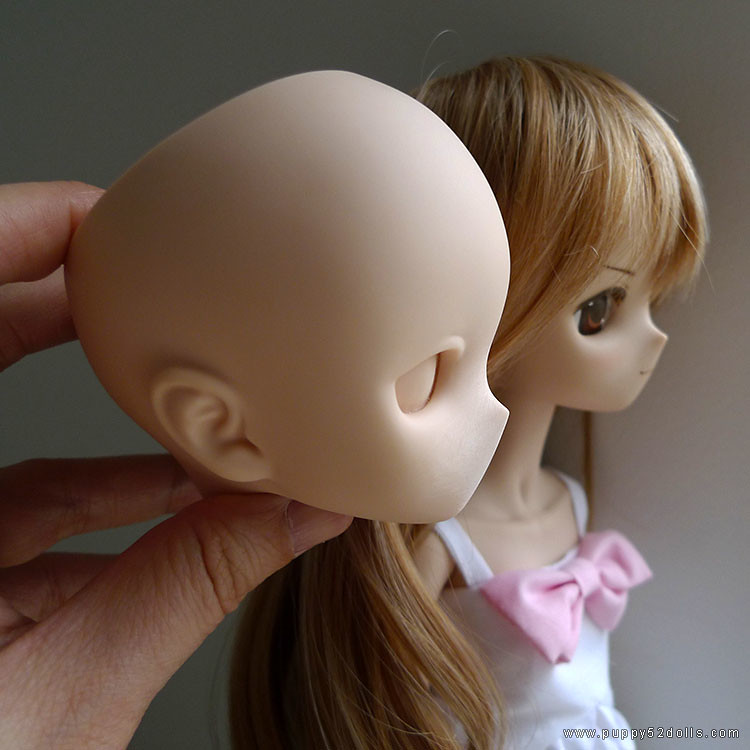
I decided to try to open the eyeholes of the closed eyed heads by myself, as the heads cost less than those which already have the eyes opened… ^^;

The thing is, eye opening was a bit more tricky than expected and I managed to blister my fingers in the process ^^; reminded me why I wasn’t doing this too often :P Also due to the customizing being handmade, it is hard to achieve the perfect smooth finish close to the original surface, which is a pity ^^; While looking at the first version for reference, I also made small changes to the 2nd version.
ETA: a custom process by Mazaku found on figure.fm :)
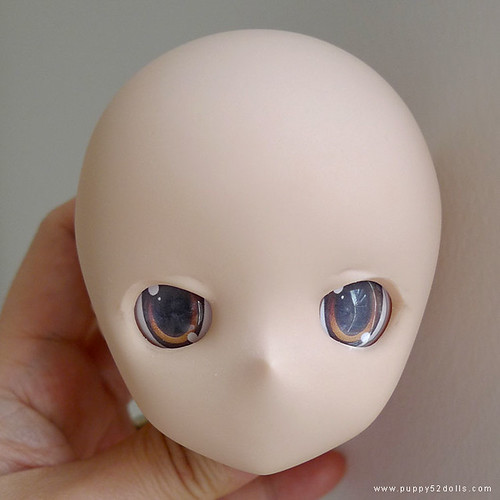
After opening the eyes — dig a hole thru the center of the eye first and carefully carve the rest off with an X-Acto knife, sand and smooth the edges. I lightly sketched some parts with a pencil to see how it look.

Dug out a pair of eyes purchased back in Japan to try the look, also used Sai to quickly paint an idea of how I wanted to do the make up.

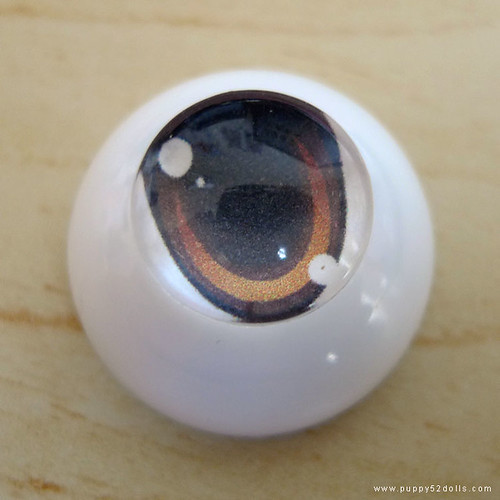
Purchased some eyes from Pupa Paradise to customise…

Notice the clear piece seem to magnify the pupil a bit, so trial and error was needed ^^;
Tested the look out, pencil marks were removed by using a clean eraser. To remove the stubborn marks, have to use a fine sanding paper, then buffing with a fingernail buffer stick. Noticed that the custom eyes are rather reflective… ^^;
Before painting the actual face up (or make up) have to spray a coat or 2 of Mr. Super Clear Matt, let it completely dry before painting. While painting, I also have some rubbing alcohol and water ready close by if I make a mistake ^^; After I decided I was done for the afternoon, I still feel that I can do better for the eyeliner… Oh well maybe next time :P And due to that the surface is not factory smooth, the blush looks a bit smudged in person ^^; looks okay in photos?
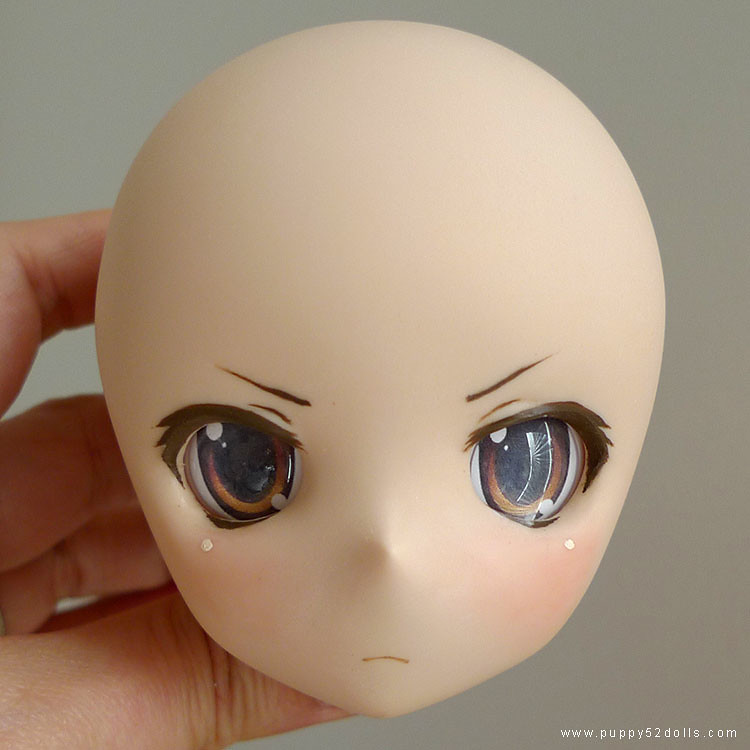
Used low heat glue gun to fix the eyes… noticed the left eye was a bit misaligned after it cooled down ^^;
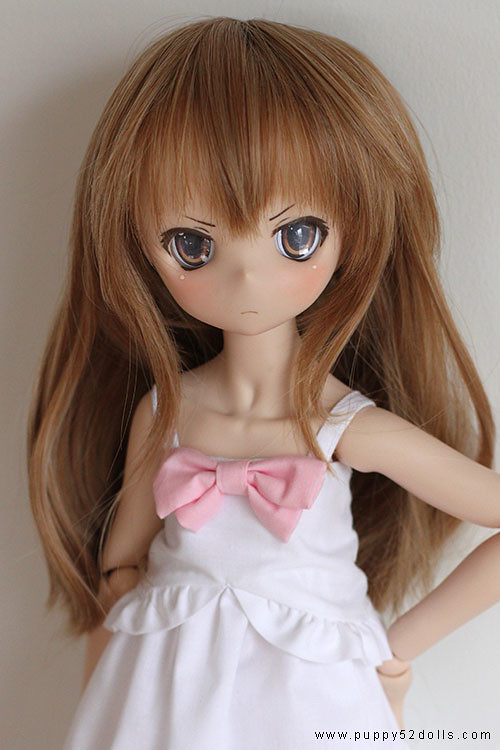
Went for tsun tsun Taiga this time… wonder if I should have give her a smirk instead?

Taiga daisuki!
HI I love your doll and was wondering were you got the eyes and the head thanx!!!
I actually answered the question in some comments above but you can get a blank head/body from http://www.volks.co.jp/en/ or volksusa.com under dollfie dream, they have tools etc as well, please look thru the links.
fantastic ^^!!!
I didn’t know you could sand the vinil and obtain such differents heads…
by “Sai” did you mean Sai markers? are they similar to Copic too markers?
again congratulation on your Taiga…she is super kawaiii
Yes the vinyl can be sanded and carved, but it will be difficult to get it factory smooth. No Sai is a program, not markers ^^; Thank you~!
WAO! Inspiration overload!
Just a question,
http://farm6.static.flickr.com/5059/5557411254_4d4c73c197.jpg
What did you use to actually paint the eyeliner? O_O
oops sorry to have taken so long to reply ^^; brush and acrylic?